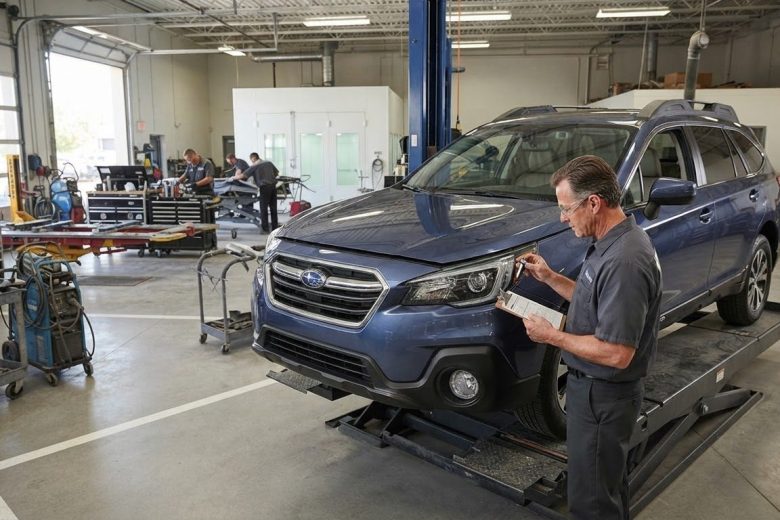
A collision can leave a vehicle looking drivable while compromising components that are difficult to see. A bent bumper reinforcement, shifted suspension part, damaged radar sensor, or distorted frame rail may not be obvious from photographs or a quick walk-around.
Choosing an auto body shop is therefore about more than restoring paint and panels. A qualified collision facility should diagnose damage systematically, follow vehicle-specific repair procedures, document the work, and verify that safety systems operate correctly before delivery.
The process typically involves inspection, estimating, insurance coordination, teardown, structural or cosmetic repairs, refinishing, reassembly, scanning, calibration, and a final quality review. Understanding each stage makes it easier to compare facilities and avoid approving incomplete work.
Start With Safety After an Accident
Call a collision repair facility after any significant impact, even when damage appears limited to a bumper or fender. Low-speed crashes can affect crash absorbers, parking sensors, wheel alignment, steering components, and mounting points behind the exterior panel. If a warning light appears, a door does not close normally, the vehicle pulls to one side, or fluids are leaking, avoid driving it unless a technician confirms it is safe.
Immediately after a crash:
- Check occupants and other parties for injuries, then contact emergency services when necessary.
- Move to a safe location only if the vehicle can be moved safely and local conditions permit.
- Photograph vehicle positions, road conditions, visible damage, license plates, and relevant traffic signs.
- Exchange information and notify the insurance carrier according to the policy.
- Do not authorize an unsafe tow to an unfamiliar destination. Ask whether the repair facility can coordinate recovery and transport.
A shop may arrange towing, perform an initial inspection, and help preserve evidence for the claim. However, photographs cannot reliably reveal structural deformation, suspension damage, crushed energy absorbers, or compromised advanced driver-assistance system (ADAS) components.
Repairs That Go Beyond Dents and Paint
Professional collision work can include:
- Frame and unibody measurement and structural repair
- Bumper, fender, hood, door, and quarter-panel repair or replacement
- Paintless dent repair where the metal and finish remain suitable
- Conventional dent repair, corrosion protection, priming, and refinishing
- Hail and storm-damage restoration
- Glass replacement, wheel repair, suspension inspection, and four-wheel alignment when related to the collision
- Diagnostic scanning and ADAS sensor calibration
Technicians decide whether to repair or replace a panel based on material, deformation, access, corrosion risk, safety requirements, and manufacturer procedures. Aluminum, high-strength steel, and carbon-fiber components require different tools and joining methods. A panel with stretched metal, a compromised reinforcement, or damage near a sensor mounting point may require replacement even if it can be reshaped.
Color matching also involves more than selecting a paint code. Technicians may use spectrophotometers, test panels, blend panels, controlled spray-booth conditions, and manufacturer-approved refinishing systems to achieve a consistent appearance across adjacent panels.
The same principles apply to economy vehicles, luxury models, electric vehicles, hybrids, and commercial fleets. Electric vehicles require attention to high-voltage isolation, battery protection, and manufacturer-specific procedures. I-CAR training, ASE credentials where applicable, OEM certifications, and documented access to repair information are useful indicators of technical competence. EPA-compliant refinishing practices and OSHA-based workplace controls also matter.
How a Vehicle Moves From Estimate to Delivery
Inspection and estimating
The process begins with photographs, measurements, diagnostic scans, and a visual inspection. The estimator records labor operations, parts, paint materials, repair procedures, and likely calibration requirements. A preliminary estimate should identify assumptions rather than present an uncertain figure as a final total.
Insurance companies may inspect the vehicle, review estimates, and approve claim-related work. They can help document coverage, but the insurer does not determine the technically correct repair method. The vehicle owner should ask the facility to explain any proposed compromise involving parts, procedures, or safety systems.
Teardown and repair
After authorization, technicians often remove damaged trim, lamps, bumpers, and interior access panels. This teardown can reveal hidden damage, leading to a supplemental estimate. The facility may then:
- Order approved parts and confirm availability.
- Measure the structure on a dedicated frame rack or computerized measuring system.
- Complete structural, mechanical, electrical, or suspension repairs.
- Repair or replace exterior panels and prepare surfaces.
- Apply primer, basecoat, clearcoat, corrosion protection, and cavity wax as required.
- Reassemble the vehicle and verify fit, function, lighting, and fluid levels.
- Perform post-repair diagnostic scans and required ADAS calibrations.
ADAS work may involve cameras, radar, ultrasonic sensors, steering-angle sensors, blind-spot monitors, and lane-departure systems. Calibration can require a level floor, target boards, wheel alignment, tire-pressure checks, and manufacturer-specified measurements. A vehicle may look perfect yet remain unsafe if these systems are not properly validated.
Completion times vary with hidden damage, parts backorders, structural work, paint curing, electrical faults, calibration requirements, and insurer approvals. Regular progress updates should identify completed stages, unresolved supplements, parts delays, and a realistic delivery date. At pickup, request a documented walk-through, repair warranty, scan or calibration records when applicable, and an explanation of any remaining limitations.
Understanding Auto Body Repair Costs
Pricing depends on:
- Damage severity, location, and accessibility
- Labor rates, body hours, paint hours, and materials
- OEM, certified aftermarket, recycled, or remanufactured parts
- Parts availability and shipping time
- Structural, mechanical, electrical, or suspension damage
- Diagnostic scanning, wheel alignment, and ADAS calibration
- Vehicle make, model, finish, construction, and technology
As broad U.S. planning ranges, a minor dent or bumper repair may cost roughly $300 to $1,200, while a larger multi-panel repair commonly reaches $2,000 to $6,000 or more. Structural collision repairs, luxury finishes, electric-vehicle damage, or extensive sensor work can exceed $10,000. These figures vary substantially by region, vehicle, parts selection, and labor rate; a physical inspection is more reliable than an online calculator.
A preliminary estimate can change after disassembly because concealed brackets, absorbers, wiring, sensors, or reinforcement members may be damaged. Supplements are normal when they are documented and justified. Request a written estimate that separates:
- Parts and part type
- Body, mechanical, electrical, and paint labor
- Procedures, scans, alignments, and calibrations
- Taxes, storage, towing, and rental-related responsibility
- Deductible and any customer-paid balance
The deductible is generally the policyholder’s responsibility, although some facilities or insurers may offer lawful assistance programs or discounts. Confirm the terms in writing; do not assume a discount eliminates contractual obligations. The most expensive work often involves structural components, advanced sensors, extensive refinishing, or parts availability—not one exterior panel alone.
How to Evaluate a Sacramento Auto Body Shop
Sacramento drivers face intense summer heat, dust, and occasional winter storms, all of which make proper paint curing, corrosion protection, glass installation, and weather sealing important. Regional traffic corridors and commuter mileage also increase the likelihood of secondary suspension or alignment concerns after an impact.
Before authorizing repairs, evaluate the facility’s actual capabilities rather than relying solely on ratings. Look for:
- I-CAR Gold Class participation, OEM certifications, ASE-qualified personnel where relevant, and ongoing training
- Frame measurement equipment, computerized diagnostics, paint-mixing and spray-booth systems, and documented calibration capability
- Experience with the specific make, model, aluminum construction, hybrid system, or electric powertrain involved
- Written procedures for parts sourcing, supplements, quality control, and warranty coverage
- Towing assistance, rental-car coordination, insurance communication, and predictable progress updates
Recent customer feedback can reveal communication patterns, but it should be checked against the shop’s equipment and repair documentation. Ask these questions before signing:
- Who will communicate with the insurance company and explain disputed operations?
- Which parts will be used, and why?
- Which manufacturer repair procedures apply?
- Will the vehicle receive pre- and post-repair diagnostic scans?
- Are wheel alignment and ADAS calibration required, and will records be provided?
- How are supplemental damages approved and communicated?
- What does the warranty cover, and are exclusions or third-party part limitations stated?
Do not rely on photographs or a quick verbal estimate for a collision repair decision. Schedule an in-person inspection so technicians can measure, scan, and document the vehicle before the repair plan is finalized.
 Ryan Thorne